


Protocol
1. Choosing the correct cuvette:
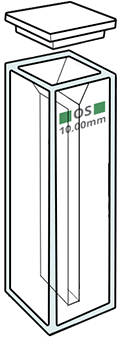
The cuvette is chosen according to the wavelength: glass does not allow for analysis beneath 330 nm, PMMA beneath 300 nm and polystyrene beneath 340 nm. Cuvettes made of polymers are disposable. Quartz (which is in fact melted SiO2) allows to work down to 200 nm.
 |
 |
 |
 |
 |
 |
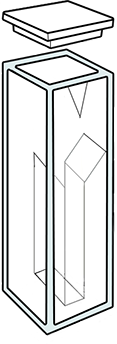 |
| 1 mm wide glass |
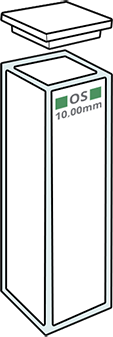
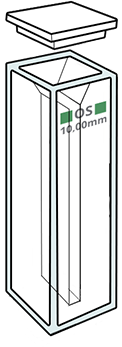
10 mm wide glass |
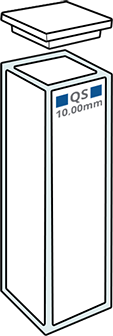
10 mm wide "quartz" |
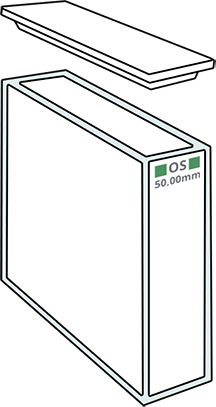
50 mm wide glass |
10 mm wide glass, small volume |
10 mm wide glass, very small volume |
10 mm wide plastic, shrinked |
The width of the cuvette is chosen in accordance to the targeted sensitivity (but 95% of analyses are done with a width L equal to 1 cm). If the sample volume is limited, it is possible to use a small-sized cuvette.
2. Turn on the spectrometer, if not already turned on
Make sure the correct light source is connected. Two light sources are necessary to cover the bandwidth 200 – 800 nm: a so-called “tungsten” lamp (W symbol) covers the near UV, up from 330 nm and the visible spectrum; a deuterium lamp (D2 symbol) covers ultraviolet wavelengths beneath 330 nm.
The below figure shows, on two different spectrometers, the kind of instruction you need to look for to turn on the light source when a dedicated switch is not present on the instrument.

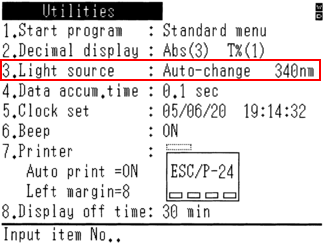
Spectrophotometers are often provided with computing systems that allow to measure the life expectancy of the lamps; an automatic lamp switch takes place at around 320 -340 nm. Make sure that the spectrometer is in “photometry” mode.
3. Selecting a wavelength to work with:
The wavelength λwork is given by the protocol, if not refer to here. On the spectrometer’s control panel, adjust the wavelength to the desired value.
The following steps are meant for single-beam instruments.
4. Measuring I0 also called “blank”
Make sure that there is no sample, close the cover of the sample compartment, and press on the “100%T” or “Zero” button.
Carry out the blank: fill a cuvette with a homogeneous solution of all the components of the mixture to analyse, EXCEPT for the studied element. In other words, fill the cuvette with the solvent, the buffer, and possible reagents that are required for the dosage. Make sure that there are no dropping on the optical sides of the cuvette (those that seem non-polished) and place the cuvette in the beam’s path. Close the cover. The light that emerges from the cuvette allows the spectrometer to evaluate I0 considered not as a luminous intensity from the spectrometer’s light source, but as an intensity arriving from the detector when all the analysis conditions are met, except for the presence of the chemical element trying to be dosed. If the absorbance exceeds 1, the blank’s components are already absorbing more than 90% of the luminous intensity. Analysis conditions become questionable. If not, press on the “100%T” or “Zero” button.
5. Measure of I or A
Fill a cuvette with a homogeneous solution of all the components of the mixture to analyse, INCLUDING the compound to be dosed. The luminous intensity that comes out of the cuvette corresponds to I0 minus the absorption due to the presence of the targeted compound. Record the displayed absorbance and carry the value over to the calibration curve. The unknown concentration can now be deduced.
- If the absorbance value exceeds 1, there is a risk that the physical quantity has gone outside of Beer-Lambert’s linearity zone. It is preferable to redo the measurement by diluting or by preparing a new sample. Redo the blank calibration if necessary.
- If the absorbance is shifting, the content of the cuvette is also shifting. A reaction is taking place, which leads to the formation of additional coloured component (often the case when a reagent is needed) or, to the contrary, to the decomposition of the absorbing molecule.